Difference between revisions of "GUI Wallet"
VeriBlockTim (talk | contribs) |
|||
| (19 intermediate revisions by 6 users not shown) | |||
| Line 1: | Line 1: | ||
| − | + | <languages/> | |
| + | <translate> | ||
| − | + | == Beta == | |
| + | |||
| + | The GUI Wallet has been updated to run with OpenJDK. | ||
| + | |||
| + | Download here: https://github.com/VeriBlock/nodecore-releases/releases/download/v0.4.10-wallet/veriblock-wallet-ui-0.4.10.zip | ||
| + | |||
| + | Code: https://github.com/VeriBlock/nodecore-wallet-ui | ||
| + | |||
| + | === Requisites === | ||
| + | * A local NodeCore instance (or access to a remote one), '''0.4.9''' or greater. See: [[NodeCore_QuickStart]] | ||
| + | * '''Java 13 or later''', such as OpenJDK 14 from https://adoptopenjdk.net. You should choose version OpenJDK 14 (Latest) using the HotSpot JVM. | ||
== Overview == | == Overview == | ||
| − | + | The VeriBlock GUI Wallet provides a way to control your wallets through a very simple interface. | |
| − | + | ||
| − | + | :GUI Wallet useful links: | |
| − | + | ::• Download --> see 'Beta' | |
| + | ::• Discord channel --> https://discord.gg/EGUDmjW | ||
| + | ::• Submit issues --> https://github.com/VeriBlock/nodecore-releases/issues | ||
| + | |||
| + | : Most recent exact links: | ||
| + | ::• MainNet --> https://explore.veriblock.org/api/stats/download | ||
| + | ::• TestNet --> https://testnet.explore.veriblock.org/api/stats/download | ||
| + | |||
| + | == Getting Started == | ||
| + | |||
| + | The VeriBlock GUI Wallet requires a local NodeCore instance, or access to a remote one. It also requires Java13+ (oracle/openjdk/adoptOpenJDK). | ||
| + | |||
| + | For more information about NodeCore, visit: [[NodeCore QuickStart]] or [[HowTo run NodeCore]]. | ||
| + | |||
| + | == Screens == | ||
| + | |||
| + | This is a general overview of each screen, highlighting useful features. This section indicates what each screen does. | ||
| + | |||
| + | === Send === | ||
| + | |||
| + | [[File:GUI_Send_1.jpeg|400px]] | ||
| + | |||
| + | [[File:GUI_Send_2.jpeg|400px]] | ||
| + | |||
| + | The Send page is used to send VeriBlock coins and to connect or check the status of the GUI Wallet's NodeCore. | ||
| + | |||
| + | If the wallet is not connected to NodeCore, the Send page will display "Please connect to NodeCore." | ||
| + | |||
| + | Three options will be featured: | ||
| + | :1. Start NodeCore | ||
| + | :: If NodeCore is already on your machine and you want to start it. | ||
| + | :2. Install NodeCore | ||
| + | :: To open a webpage with install instructions. | ||
| + | :3. Reconnect to NodeCore | ||
| + | :: If NodeCore is already running, but you need to reconnect. | ||
| + | |||
| + | A link will also be featured on the page to connect to the VeriBlock Discord community for further questions. | ||
| + | |||
| + | Once your GUI Wallet is connected to NodeCore, the Send page will be used strictly for sending coins. Multiple address will be listed in the drop-down box located beside "Send From Address" for the user to select when sending VeriBlock coins. | ||
| + | |||
| + | This page also features a NodeCore informative bar located at the bottom of the screen. The bar will display whether the GUI Wallet is connected to NodeCore, syncing to NodeCore or not connected to NodeCore. If the GUI Wallet is syncing, this bar will also display an approximate time for the wallet to be fully synced with NodeCore. If the wallet is not connected to NodeCore, the sending transactions options will note appear on the page. | ||
| + | |||
| + | === Transactions === | ||
| + | |||
| + | |||
| + | [[File:GUI_Transactions.jpeg|400px]] | ||
| + | |||
| + | The Transactions page displays all transactions that have occurred, whether sent or received, using your GUI Wallet. | ||
| + | |||
| + | Transactions, both pending and confirmed, are organized based on which wallet address was used to complete the transaction. Wallet addresses can be selected by clicking the drop-down menu next to "Address" in the top left-hand corner. The viewing address will be displayed above the address box under "Transactions." | ||
| + | |||
| + | Transactions will be displayed either as "Pending" or "Confirmed," and will feature information regarding each transaction, including what address the transaction is from, the amount and status. | ||
| + | |||
| + | In addition, the Transaction page features a button to "Rebuild Wallet Cache," which can used if the cache isn't fully synced or needs to be rebuilt to catch old transactions on imported wallets. | ||
| + | |||
| + | === My Addresses === | ||
| + | |||
| + | [[File:GUI_MyAddresses.jpeg|400px]] | ||
| + | |||
| + | My Addresses lists all the addresses contained within your NodeCore wallet. | ||
| + | |||
| + | At the top of the screen, in the upper left-hand corner under "My Addresses" a total balance of all wallet addresses will be listed. This displays your total amount of VeriBlock coins found in all addresses in your NodeCore wallet. | ||
| + | |||
| + | Each address will display the balance of the address, both the confirmed balance and the pending balance, which will change with both sending and receiving coins. You also have the option to choose which address you wish to be your default, and give each address a nickname to aid with confusion. | ||
| + | |||
| + | Addresses with zero balance are automatically hidden from the list, but can be displayed by clicking the box next to "Hid addresses with zero balance," featured just before your listed addresses. | ||
| + | |||
| + | In the top, right-hand section of the page, you have the option to create a new address and export your information to a CSV file. | ||
| + | |||
| + | === PoP Miner === | ||
| + | |||
| + | [[File:GUI_PoPMiner.jpeg|400px]] | ||
| + | |||
| + | The PoP Miner page is used strictly for mining the VeriBlock PoP Miner. | ||
| + | |||
| + | When the screen first opens, a pop-up window will appear to configure the PoP Service. In this window, users can connect to the PoP Service by clicking "Start PoP Service," or check to see if the PoP miner is running and if the GUI Wallet can access it properly by clicking "Test PoP Connectivity." Once the pop-up window has been closed, it can be accessed again on the PoP Miner page by clicking "Connect to PoP Service" found in the top left-hand corner. | ||
| + | |||
| + | The page features a detailed list of Current Operations and Recent Rewards, and displays the users Bitcoin balance and VeriBlock address. If needed, more Bitcoin coins can be added to the VeriBlock address by clicking "Deposit BTC." | ||
| + | |||
| + | In addition, users can select "Mine some PoP" to give the service the command to mine, and have the option to choose a specific block to mine. Users can also set up automine by clicking "AutoMine Setup." | ||
| + | |||
| + | === Settings === | ||
| + | |||
| + | [[File:GUI_Settings.jpeg|400px]] | ||
| + | |||
| + | On the Settings page, users have the option to select their language preference between English, Italian, Romanian and Chinese; and enable or disable sound effects. | ||
| + | |||
| + | Users can also encrypt their wallet on the Settings page. Encryption provides an additional layer of security in case someone gains access to your wallet. By clicking "Encrypt Wallet" a password will be set for your wallet to ensure that only the person with the password will gain access. Users can also remove the password by clicking "Clear Password." | ||
| + | |||
| + | The Application User Directory is also featured on this page. | ||
| + | |||
| + | === Import and Backup === | ||
| + | |||
| + | [[File:GUI_ImportBackup.jpeg|400px]] | ||
| + | |||
| + | The Import and Backup page allows users to backup their VeriBlock GUI Wallet and import existing addresses to their GUI Wallet. | ||
| + | |||
| + | Under "Backup your wallet," users have the option to backup their GUI Wallet to a file on their computer where NodeCore is running, or back up a single address to a private key. | ||
| + | |||
| + | Under "Import a wallet," users are able to import a single address to merge into the existing wallet, which does not override the addresses, or import a single address using a private key. | ||
| + | |||
| + | === Help === | ||
| + | |||
| + | [[File:GUI_Help.jpeg|400px]] | ||
| + | |||
| + | The Help page provides links to VeriBlock's website, online dashboard, Wiki page and Discord channel. | ||
| + | |||
| + | === Diagnostics === | ||
| + | |||
| + | [[File:GUI_Diagnostics.jpeg|400px]] | ||
| + | |||
| + | The Diagnostics page displays the basic diagnostic info for your VeriBlock GUI Wallet, which can help when troubleshooting NodeCore issues. | ||
| + | |||
| + | === About === | ||
| + | |||
| + | [[File:GUI_About.jpeg|400px]] | ||
| + | |||
| + | The About page features the VeriBlock logo, as well as a link to the VeriBlock website ''[[www.VeriBlock.org]]''. | ||
| + | |||
| + | The page also includes the current VeriBlock GUI Wallet downloaded to your device, and the date complied. | ||
| + | |||
| + | == Common Tasks == | ||
| + | |||
| + | |||
| + | === Setting Up Your GUI Wallet === | ||
| + | |||
| + | '''Step 1''' | ||
| + | Open the VeriBlock GUI Wallet program. | ||
| + | |||
| + | '''Step 2''' | ||
| + | Select the language of your preference, then click "Get Started." | ||
| + | |||
| + | '''Step 3''' | ||
| + | Click "Create New Address" located in the top-right corner of your screen. | ||
| + | ''Skip to Step 6 if you wish to use the default address assigned to your account.'' | ||
| + | |||
| + | '''Step 4''' | ||
| + | A confirmation window will appear asking to confirm if you wish to create a new address. Click "OK." | ||
| + | |||
| + | '''Step 5''' | ||
| + | A new window will appear asking if you want to backup your new wallet. It's highly suggested you do this. Click "OK." | ||
| + | |||
| + | '''Step 6''' | ||
| + | Before continuing, if you have multiple addresses in your wallet it's a good idea to give each wallet address a nickname to help prevent confusion. To give your address a nickname, simply click the text box found under "Nickname," located beside the address you want to name, and type in your chosen nickname. To save, just click anywhere outside of the text box. | ||
| + | |||
| + | '''Step 7''' | ||
| + | While the current window is open, make sure your chosen address is selected for default. If you wish to change your default address, just click the "Make Default" button. A confirmation window will appear, click "OK." | ||
| + | ''Note: When you view "My Addresses" found on the navigation bar, addresses with zero balance will be hidden. You have the option to turn this off and display all addresses if desired.'' | ||
| + | |||
| + | === Submitting A Transaction === | ||
| + | '''Step 1''' | ||
| + | Click "Send" found in your navigation screen located to the left of your window. | ||
| + | |||
| + | '''Step 2''' | ||
| + | Click the drop-down menu located next to "Send From Address" to select which address your coins will be sent from. Select the correct address from the drop-down menu. | ||
| + | |||
| + | '''Step 3''' | ||
| + | In the same window, enter the address you wish to send coins too in the text box found beside "Send To Address." Then enter the amount of VBK coins you wish to send in the text box next to "Amount." Once everything is completed, click "Send." | ||
| + | |||
| + | '''Step 4''' | ||
| + | Verify that the recipient's address is correct, as well as the amount of coins to send. If correct, click "OK." If an error is found, click "Cancel" and make needed corrections, then click "OK." | ||
| + | |||
| + | ''' Step 5''' | ||
| + | If the coins have been sent successfully, a confirmation window will appear. Click "OK" to exit the confirmation window. | ||
| + | ''If an error message appears, recheck to make sure the address you've entered next to "Send To Address" is correct, and that you are not sending more coins than you have in your wallet. Repeat Step 4.'' | ||
| + | |||
| + | === How To Receive Coins === | ||
| + | '''Step 1''' | ||
| + | Click "My Addresses" found on your navigation bar, located to the left. | ||
| + | |||
| + | '''Step 2''' | ||
| + | Click the address you wish to receive coins. Make sure the address is highlighted in black. | ||
| + | |||
| + | '''Step 3''' | ||
| + | Left click your mouse and click "Copy Value(s)" on the pop-up window that appears to save your address to your clipboard. | ||
| + | |||
| + | '''Step 4''' | ||
| + | Place the copied address in the withdrawal box on the exchange site of your preference and complete your transaction on the exchange site. | ||
| + | |||
| + | === How to backup your wallet === | ||
| + | |||
| + | <em>'''Backup to your computer'''</em> | ||
| + | |||
| + | <p>'''Step 1''' In the menu bar of the VeriBlock GUI Wallet, click "Import and Backup." | ||
| + | <p>'''Step 2''' To back up your wallet to a file on your computer where NodeCore is running, click "Choose Folder" and locate the folder you wish to use to backup your wallet. | ||
| + | <p>'''Step 3''' Click "Backup Wallet." | ||
| + | <br> | ||
| + | <br> | ||
| + | <em><p>'''Backup using a private key'''</em> | ||
| + | <p>'''Step 1''' In the menu bar of the VeriBlock GUI Wallet, click "Import and Backup." | ||
| + | <p>'''Step 2''' To back up a single address in your GUI Wallet with a private key, select which address you wish to back up by selecting it from the drop-down menu bar beside "Backup a single address." | ||
| + | <p>'''Step 3''' Click "Show Private Key." A new menu will appear displaying the private key to your chosen address. | ||
| + | |||
| + | === Connecting to a remote node or different IP === | ||
| + | To connect your GUI Wallet to a remote node or different IP, you must configure settings in the file: <pre>nodecore_wallet_ui.properties</pre> | ||
| + | |||
| + | On Windows, this file is located at: <pre>C:\Users\<username>\nodecore-wallet-ui-0.4</pre> | ||
| + | |||
| + | First, close the GUI Wallet and open the config file: <pre>nodecore_wallet_ui.properties</pre> | ||
| + | |||
| + | Update your NodeCore address on the line: <pre>nodecore.address=127.0.0.1</pre> | ||
| + | Change the port with: <pre>nodecore.port=10500</pre> | ||
| + | And, if required, enter your password here: | ||
| + | <pre>rpc.security.password=</pre> | ||
| + | Once this file has been updated, save your update and reopen your GUI Wallet. | ||
| + | |||
| + | == Troubleshooting == | ||
| + | |||
| + | |||
| + | === NodeCore is stuck on a block === | ||
| + | |||
| + | Ideally this should not happen, but if it does first try restarting NodeCore. | ||
| + | |||
| + | === Java out-of-memory === | ||
| + | |||
| + | It is possible that you only have a 32-bit version of Java installed; 64-bit is highly recommended. | ||
| + | |||
| + | Modify the start file (nodecore.bat for windows, nodecore for linux) to increase the memory limit. Pass in a value, such as "1024 MB" into the DEFAULT_JVM_OPTS variable: | ||
| + | |||
| + | <pre> | ||
| + | DEFAULT_JVM_OPTS=-Xmx1024m | ||
| + | </pre> | ||
| + | |||
| + | === NodeCore keeps turning off with "Application exit" === | ||
| + | |||
| + | If messages like this appears: | ||
| + | <pre> | ||
| + | INFO [main] n.Program [Program.java:133] Application exit | ||
| + | </pre> | ||
| + | |||
| + | Then something external is shutting off NodeCore, such as a server restart, external process kill or something else. | ||
| + | |||
| + | === Having trouble on a mac === | ||
| + | |||
| + | On a Mac, you need to install the JDK (Java Development Kit) instead of just the JRE: http://www.oracle.com/technetwork/java/javase/downloads/jdk8-downloads-2133151.html | ||
| + | |||
| + | == For More Information == | ||
| + | |||
| + | ===GUI Wallet=== | ||
| + | For more information about VeriBlock's GUI Wallet, visit [https://github.com/VeriBlock/nodecore-wallet-ui VeriBlock GUI Wallet GitHub]. | ||
| + | |||
| + | :*A YouTube demonstration on how to install the GUI Wallet can be found here --> [https://www.youtube.com/watch?v=8xBUnHYIV_8&feature=youtu.be YouTube GUI Wallet Demo]. <i>Author: focanis#1122<i/> | ||
| + | ===NodeCore=== | ||
| + | For more information about NodeCore, visit [[HowTo run NodeCore]] and [[NodeCore CommandLine]]. | ||
| − | |||
| − | |||
| − | |||
| − | |||
| − | |||
| − | |||
| − | |||
| − | |||
| − | |||
| − | |||
| − | |||
| − | |||
| − | |||
| − | |||
| − | |||
| − | + | </translate> | |
Latest revision as of 19:43, 28 September 2020
Contents
Beta
The GUI Wallet has been updated to run with OpenJDK.
Download here: https://github.com/VeriBlock/nodecore-releases/releases/download/v0.4.10-wallet/veriblock-wallet-ui-0.4.10.zip
Code: https://github.com/VeriBlock/nodecore-wallet-ui
Requisites
- A local NodeCore instance (or access to a remote one), 0.4.9 or greater. See: NodeCore_QuickStart
- Java 13 or later, such as OpenJDK 14 from https://adoptopenjdk.net. You should choose version OpenJDK 14 (Latest) using the HotSpot JVM.
Overview
The VeriBlock GUI Wallet provides a way to control your wallets through a very simple interface.
- GUI Wallet useful links:
- • Download --> see 'Beta'
- • Discord channel --> https://discord.gg/EGUDmjW
- • Submit issues --> https://github.com/VeriBlock/nodecore-releases/issues
- Most recent exact links:
- • MainNet --> https://explore.veriblock.org/api/stats/download
- • TestNet --> https://testnet.explore.veriblock.org/api/stats/download
Getting Started
The VeriBlock GUI Wallet requires a local NodeCore instance, or access to a remote one. It also requires Java13+ (oracle/openjdk/adoptOpenJDK).
For more information about NodeCore, visit: NodeCore QuickStart or HowTo run NodeCore.
Screens
This is a general overview of each screen, highlighting useful features. This section indicates what each screen does.
Send
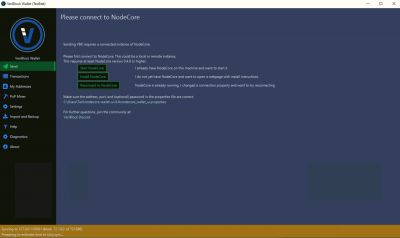
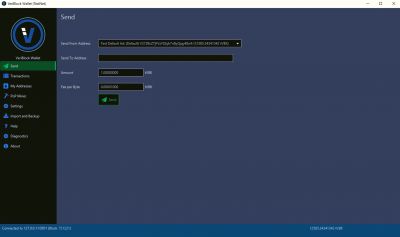
The Send page is used to send VeriBlock coins and to connect or check the status of the GUI Wallet's NodeCore.
If the wallet is not connected to NodeCore, the Send page will display "Please connect to NodeCore."
Three options will be featured:
- 1. Start NodeCore
- If NodeCore is already on your machine and you want to start it.
- 2. Install NodeCore
- To open a webpage with install instructions.
- 3. Reconnect to NodeCore
- If NodeCore is already running, but you need to reconnect.
A link will also be featured on the page to connect to the VeriBlock Discord community for further questions.
Once your GUI Wallet is connected to NodeCore, the Send page will be used strictly for sending coins. Multiple address will be listed in the drop-down box located beside "Send From Address" for the user to select when sending VeriBlock coins.
This page also features a NodeCore informative bar located at the bottom of the screen. The bar will display whether the GUI Wallet is connected to NodeCore, syncing to NodeCore or not connected to NodeCore. If the GUI Wallet is syncing, this bar will also display an approximate time for the wallet to be fully synced with NodeCore. If the wallet is not connected to NodeCore, the sending transactions options will note appear on the page.
Transactions
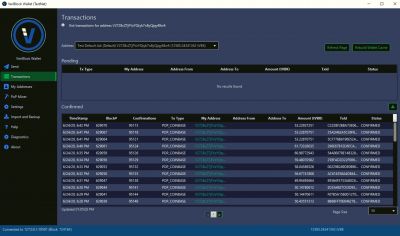
The Transactions page displays all transactions that have occurred, whether sent or received, using your GUI Wallet.
Transactions, both pending and confirmed, are organized based on which wallet address was used to complete the transaction. Wallet addresses can be selected by clicking the drop-down menu next to "Address" in the top left-hand corner. The viewing address will be displayed above the address box under "Transactions."
Transactions will be displayed either as "Pending" or "Confirmed," and will feature information regarding each transaction, including what address the transaction is from, the amount and status.
In addition, the Transaction page features a button to "Rebuild Wallet Cache," which can used if the cache isn't fully synced or needs to be rebuilt to catch old transactions on imported wallets.
My Addresses
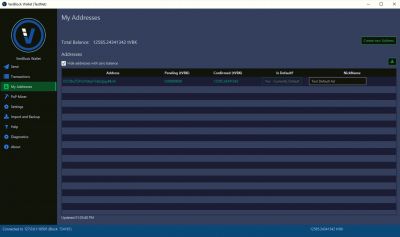
My Addresses lists all the addresses contained within your NodeCore wallet.
At the top of the screen, in the upper left-hand corner under "My Addresses" a total balance of all wallet addresses will be listed. This displays your total amount of VeriBlock coins found in all addresses in your NodeCore wallet.
Each address will display the balance of the address, both the confirmed balance and the pending balance, which will change with both sending and receiving coins. You also have the option to choose which address you wish to be your default, and give each address a nickname to aid with confusion.
Addresses with zero balance are automatically hidden from the list, but can be displayed by clicking the box next to "Hid addresses with zero balance," featured just before your listed addresses.
In the top, right-hand section of the page, you have the option to create a new address and export your information to a CSV file.
PoP Miner
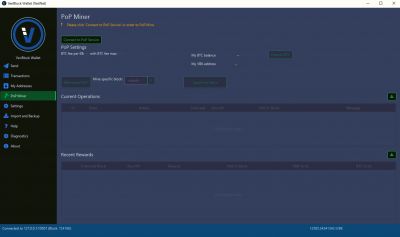
The PoP Miner page is used strictly for mining the VeriBlock PoP Miner.
When the screen first opens, a pop-up window will appear to configure the PoP Service. In this window, users can connect to the PoP Service by clicking "Start PoP Service," or check to see if the PoP miner is running and if the GUI Wallet can access it properly by clicking "Test PoP Connectivity." Once the pop-up window has been closed, it can be accessed again on the PoP Miner page by clicking "Connect to PoP Service" found in the top left-hand corner.
The page features a detailed list of Current Operations and Recent Rewards, and displays the users Bitcoin balance and VeriBlock address. If needed, more Bitcoin coins can be added to the VeriBlock address by clicking "Deposit BTC."
In addition, users can select "Mine some PoP" to give the service the command to mine, and have the option to choose a specific block to mine. Users can also set up automine by clicking "AutoMine Setup."
Settings
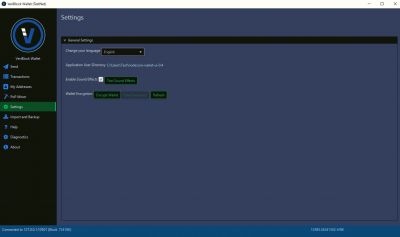
On the Settings page, users have the option to select their language preference between English, Italian, Romanian and Chinese; and enable or disable sound effects.
Users can also encrypt their wallet on the Settings page. Encryption provides an additional layer of security in case someone gains access to your wallet. By clicking "Encrypt Wallet" a password will be set for your wallet to ensure that only the person with the password will gain access. Users can also remove the password by clicking "Clear Password."
The Application User Directory is also featured on this page.
Import and Backup
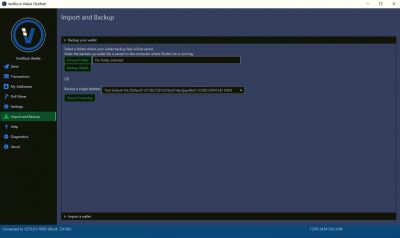
The Import and Backup page allows users to backup their VeriBlock GUI Wallet and import existing addresses to their GUI Wallet.
Under "Backup your wallet," users have the option to backup their GUI Wallet to a file on their computer where NodeCore is running, or back up a single address to a private key.
Under "Import a wallet," users are able to import a single address to merge into the existing wallet, which does not override the addresses, or import a single address using a private key.
Help
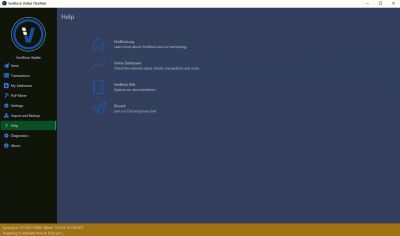
The Help page provides links to VeriBlock's website, online dashboard, Wiki page and Discord channel.
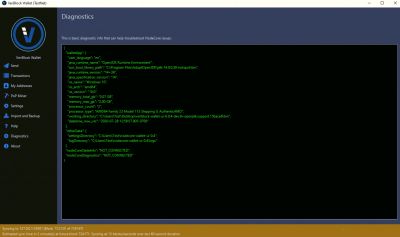
Diagnostics
The Diagnostics page displays the basic diagnostic info for your VeriBlock GUI Wallet, which can help when troubleshooting NodeCore issues.
About
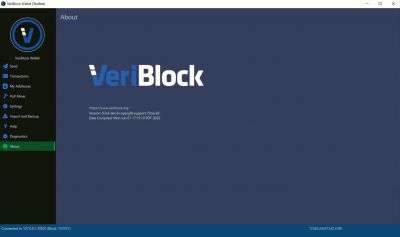
The About page features the VeriBlock logo, as well as a link to the VeriBlock website www.VeriBlock.org.
The page also includes the current VeriBlock GUI Wallet downloaded to your device, and the date complied.
Common Tasks
Setting Up Your GUI Wallet
Step 1 Open the VeriBlock GUI Wallet program.
Step 2 Select the language of your preference, then click "Get Started."
Step 3 Click "Create New Address" located in the top-right corner of your screen. Skip to Step 6 if you wish to use the default address assigned to your account.
Step 4 A confirmation window will appear asking to confirm if you wish to create a new address. Click "OK."
Step 5 A new window will appear asking if you want to backup your new wallet. It's highly suggested you do this. Click "OK."
Step 6 Before continuing, if you have multiple addresses in your wallet it's a good idea to give each wallet address a nickname to help prevent confusion. To give your address a nickname, simply click the text box found under "Nickname," located beside the address you want to name, and type in your chosen nickname. To save, just click anywhere outside of the text box.
Step 7 While the current window is open, make sure your chosen address is selected for default. If you wish to change your default address, just click the "Make Default" button. A confirmation window will appear, click "OK." Note: When you view "My Addresses" found on the navigation bar, addresses with zero balance will be hidden. You have the option to turn this off and display all addresses if desired.
Submitting A Transaction
Step 1 Click "Send" found in your navigation screen located to the left of your window.
Step 2 Click the drop-down menu located next to "Send From Address" to select which address your coins will be sent from. Select the correct address from the drop-down menu.
Step 3 In the same window, enter the address you wish to send coins too in the text box found beside "Send To Address." Then enter the amount of VBK coins you wish to send in the text box next to "Amount." Once everything is completed, click "Send."
Step 4 Verify that the recipient's address is correct, as well as the amount of coins to send. If correct, click "OK." If an error is found, click "Cancel" and make needed corrections, then click "OK."
Step 5 If the coins have been sent successfully, a confirmation window will appear. Click "OK" to exit the confirmation window. If an error message appears, recheck to make sure the address you've entered next to "Send To Address" is correct, and that you are not sending more coins than you have in your wallet. Repeat Step 4.
How To Receive Coins
Step 1 Click "My Addresses" found on your navigation bar, located to the left.
Step 2 Click the address you wish to receive coins. Make sure the address is highlighted in black.
Step 3 Left click your mouse and click "Copy Value(s)" on the pop-up window that appears to save your address to your clipboard.
Step 4 Place the copied address in the withdrawal box on the exchange site of your preference and complete your transaction on the exchange site.
How to backup your wallet
Backup to your computer
Step 1 In the menu bar of the VeriBlock GUI Wallet, click "Import and Backup."
Step 2 To back up your wallet to a file on your computer where NodeCore is running, click "Choose Folder" and locate the folder you wish to use to backup your wallet.
Step 3 Click "Backup Wallet."
Backup using a private key
Step 1 In the menu bar of the VeriBlock GUI Wallet, click "Import and Backup."
Step 2 To back up a single address in your GUI Wallet with a private key, select which address you wish to back up by selecting it from the drop-down menu bar beside "Backup a single address."
Step 3 Click "Show Private Key." A new menu will appear displaying the private key to your chosen address.
Connecting to a remote node or different IP
To connect your GUI Wallet to a remote node or different IP, you must configure settings in the file:
nodecore_wallet_ui.properties
On Windows, this file is located at:
C:\Users\<username>\nodecore-wallet-ui-0.4
First, close the GUI Wallet and open the config file:
nodecore_wallet_ui.properties
Update your NodeCore address on the line:
nodecore.address=127.0.0.1
Change the port with:
nodecore.port=10500
And, if required, enter your password here:
rpc.security.password=
Once this file has been updated, save your update and reopen your GUI Wallet.
Troubleshooting
NodeCore is stuck on a block
Ideally this should not happen, but if it does first try restarting NodeCore.
Java out-of-memory
It is possible that you only have a 32-bit version of Java installed; 64-bit is highly recommended.
Modify the start file (nodecore.bat for windows, nodecore for linux) to increase the memory limit. Pass in a value, such as "1024 MB" into the DEFAULT_JVM_OPTS variable:
DEFAULT_JVM_OPTS=-Xmx1024m
NodeCore keeps turning off with "Application exit"
If messages like this appears:
INFO [main] n.Program [Program.java:133] Application exit
Then something external is shutting off NodeCore, such as a server restart, external process kill or something else.
Having trouble on a mac
On a Mac, you need to install the JDK (Java Development Kit) instead of just the JRE: http://www.oracle.com/technetwork/java/javase/downloads/jdk8-downloads-2133151.html
For More Information
GUI Wallet
For more information about VeriBlock's GUI Wallet, visit VeriBlock GUI Wallet GitHub.
- A YouTube demonstration on how to install the GUI Wallet can be found here --> YouTube GUI Wallet Demo. Author: focanis#1122
NodeCore
For more information about NodeCore, visit HowTo run NodeCore and NodeCore CommandLine.
